Day 1 at the ranch

Day 1 –

So day one of our training is wrapping up.  Yeah there are a bunch of us still in the lab at 9:30pm after starting at 9am.  This is the very first time they have offered the advanced iOS class and consequently we have discovered several small problems with the materials but that is to be expected.  To compensate, we have not one but three excellent instructors here with us and I have to say despite the exhaustion of the long day I am learning a lot.

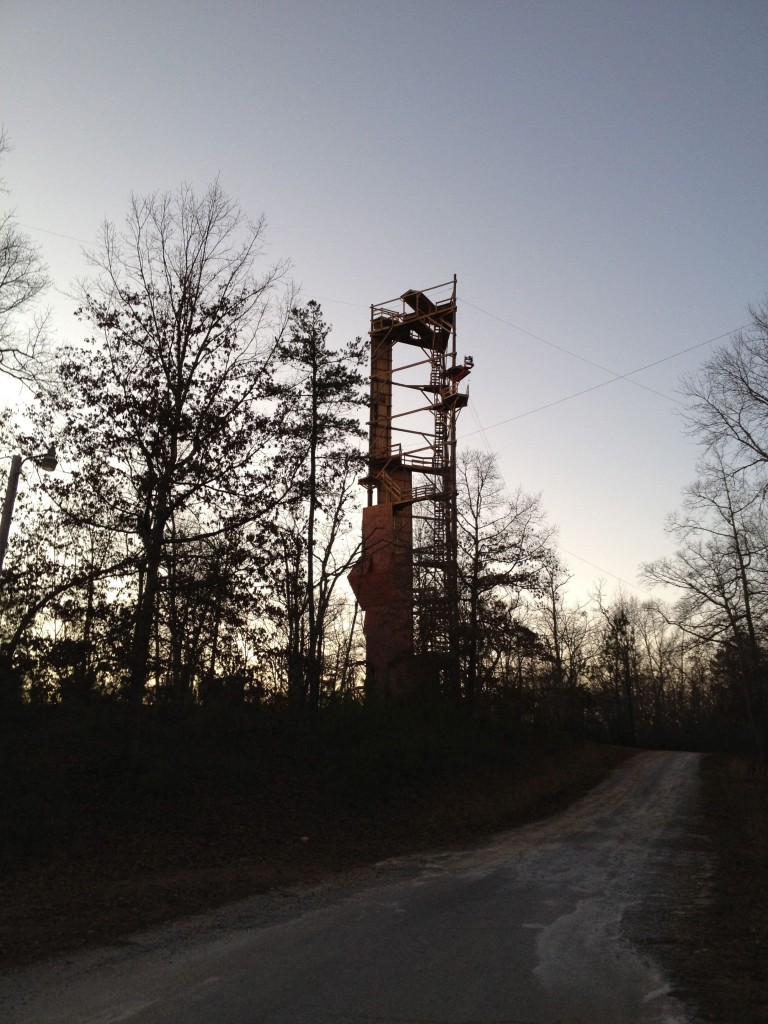
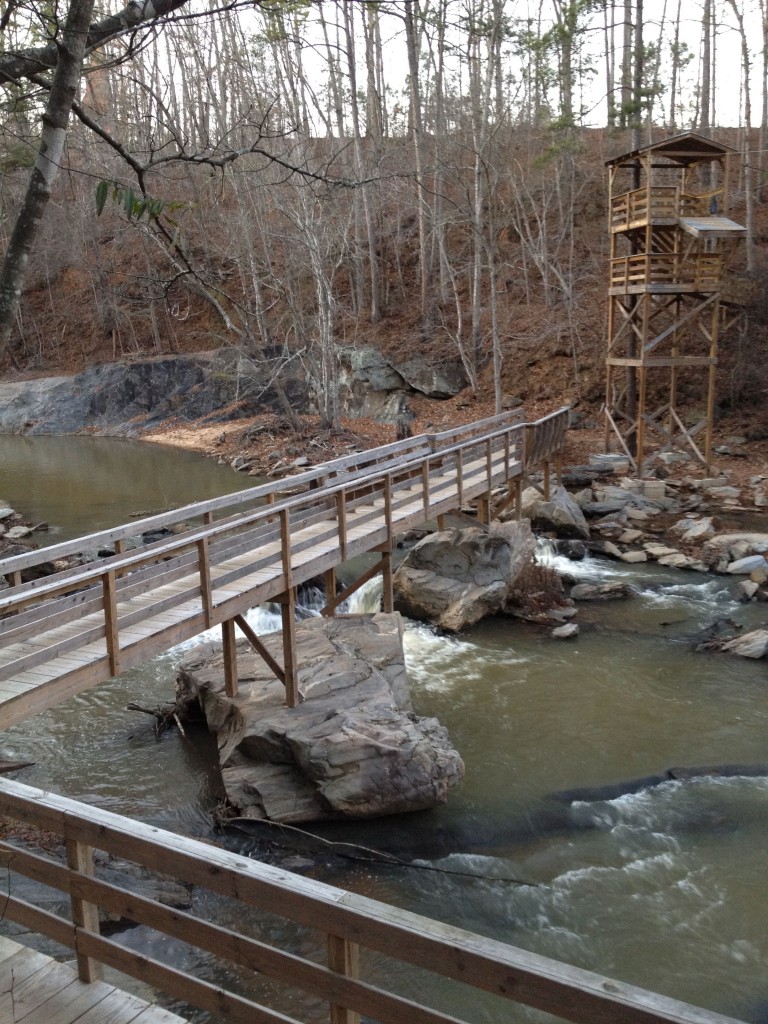
We took a short break around 3:30 to hike around outside.  The weather is such that I almost didn’t need a jacket which totally ROCKS since it is January.  The weather here really makes me want to move south.  In terms of ground covered, I didn’t really cover any new territory than what I saw by myself last night but it was great to get outside, enjoy the beautiful surroundings, and rest my mind.  Every time I go outside I am staring up at those zip-line cables.  I have yet to see anyone on them but man are they impressive.  Some of the stands are WAY up in the air and some are literally just a few boards wrapping a huge tree with no ladder or stairs.  It looks like it would be fun and terrifying.

IMG_1007-1024x768
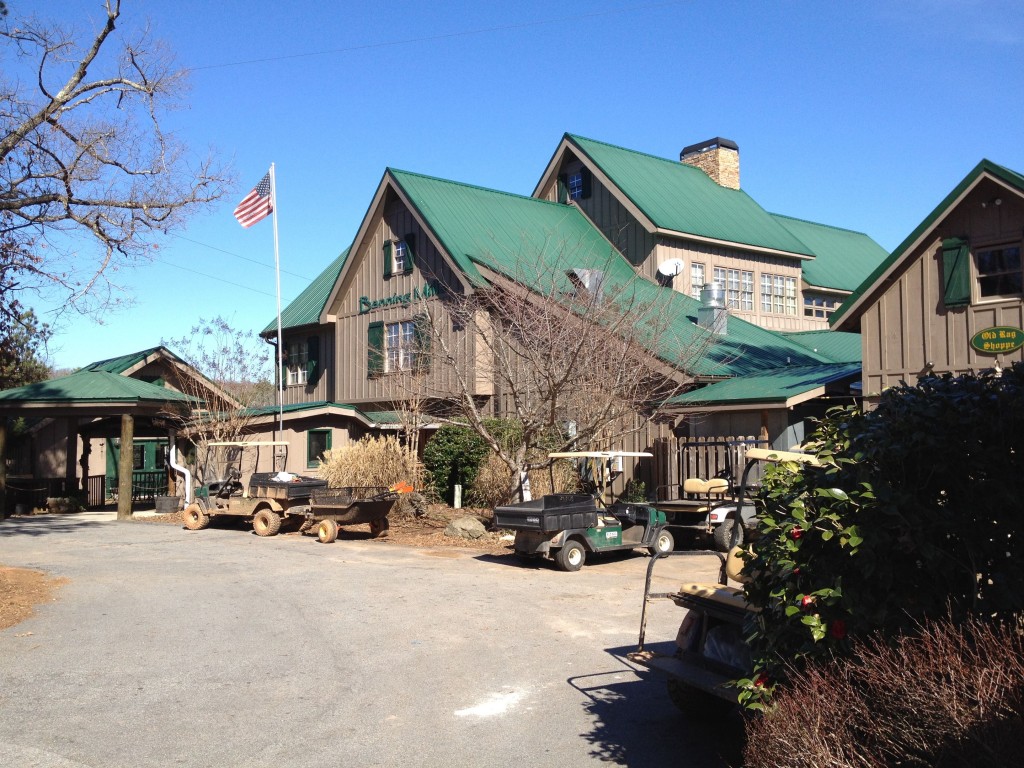
What about the food?  Anytime I travel anywhere I always panic about food since I have the gourmet palette of a 12 year old.  The folks that run the Banning Mills facility have been awesome for accommodating my crazy cheese-free, simple, diet.  Right off the bat, they had a salad prepared for me without cheese!  Woo-hoo!  The main course last night was some sort of stuffed chicken and mine came without the cheese sauce!  Again I was impressed but really didn’t care for it since it had the stuffing.  Today’s food however has been great starting with a very good breakfast with fresh fruit and bacon.  Lunch was chicken legs and corn on the cob both which were very good.  Dinner was something new (for me) called Souvlaki.  It was a pork loin with greek seasoning on skewers.  It was actually pretty good!  Dessert was apple crisp which I decided to try since I am being adventurous and it was good too!  All said, I am eating well and I am really thankful they have honored my strange requests.

So what did we cover today?  We started with Storyboards and in particular custom segues.  This gave me a chance to experiment with some Core Animation effects I had never seen yet.  We then moved into the core image framework and filtering.  The variety of options available in this API is impressive especially since it is new with iOS 5!  We did a nice lab with face detection.  We also applied various filters (like sepia) to any photo picked from the photo library.  I finished the lab early so was able to experiment with some other filter effects.  Note that filters can also be chained together which can give you a lot of power.

We continued with more Core Animation and then wrapped up with Core Motion and using the 3rd party Core Plot framework.  Both labs involved a lot of typing and debugging but ended up with sample apps that were quite awesome.  Yes that was a LOT of stuff to cover in one day but every part of it was cool and revealed something new that I hadn’t seen.

The lessons and labs are interspersed with some great productivity tips.  For example control->command->up and down arrow are shortcuts for flipping between your header and implementation files.  Simple tip, but I have probably used it 50 times since it came up this morning.  It is one of those conveniences that is etched in my mind now.

Though we have seen a few issues with the lab manual, they are kind of a blessing in disguise.  The best way to get deep knowledge of anything is to challenge yourself and wrestle with a problem.  These minor issues, when they have occurred,  have caused us to dig deeper.  Looking forward to another great day tomorrow!

Hello from the Big Nerd Ranch

IMG_0996-768x1024Howdy partner!

It was a long day of driving but we are here! We left around 9 am and drove straight from Cincinnati to the south-west side of Atlanta only stopping for gas and a short lunch at Fazolis.

The last several miles were just 2 lane roads which seemed to take forever but we had a nice marathon session of audiobooks and NSBrief podcasts to listen to.

After driving deeper into the middle of nowhere we ended up at the red dot on the iPhone GPS – Historic Bannning Mills. When we got here, we weren’t sure we were in the right place. There were a bunch of cabins in the woods and zip-line tree stands all over the place. It looked like a fun place – really not what you’d expect from typical training – though we are not expecting typical training – this is an Advanced iOS bootcamp after all!

IMG_0998-768x1024At the bottom of a hill was the main lodge building which I’ve got to say is really cool inside. I love lodge-style architecture and this one has the essential heavy exposed wood beams, large stone fireplace, cool spiral wood and wrought iron stair case, and the quintessential nice assortment of stuffed animals. Some nice soft bluegrass music is playing here as I type this.

My cabin is pretty nice too! I don’t like cold so I was very pleased to see that I have my own gas fireplace. Actually it looks more like an old wood IMG_0971-1024x768burning stove but it can generate heat! The corner of the room has a big whirlpool tub which I really doubt I will have time to use but it makes the room look nice. The balcony in back has a great view of the stream in the valley below complete with the nice subtle roar of the small waterfalls. If it was warmer, I would leave the door open!

IMG_0987-768x1024Before dinner I took about 15 minutes to quickly explore the nearby trails. From the map, it looks like there are trails everywhere. I love hiking and exploring so this is really cool! There are ruins of old buildings and an old dam.

All kidding aside, this looks like a great place to focus and learn isolated from the hustle of the nearby city. I doubt I am going to have any time for ziplining or much time to hike though I will try to get out for a few minutes if we have breaks!


The syllabus looks broad and intense. It covers a lot of things that I am really looking forward to hearing more about. Class begins tomorrow at 9am sharp!

I am still here!

Hey everyone! It has been a while since I have written anything yet I have been hearing nice comments from many of you regularly for several days. Thanks EVERYONE for stopping by. How you find this site is a serious mystery but somehow you find it. The number of visits and diversity of locations from which you are from is very cool! It is really meaningful to see things have started to take off.

So what have I been doing? I have been working a LOT of hours lately both with my day job and some other side projects. Also my wife had knee surgery so I have been quite busy helping out around the house. Consequently my writing time has been lacking. It hasn’t been bad though. The work has been a lot of fun! I have been learning a lot about core animation and listening to the Stanford University Advanced iPhone classes during my daily commute. These are a great FREE resource if you are interested in learning more about iOS. Apple development is a blast and the tools and API really give us developers a lot of power.

I did take a break a couple weeks ago from the development activities to meet again with the band. We hadn’t practiced in months but wanted to meet and record some demo material in case we do try to play out later this spring. The recording sessions went quite well overall and my buddy and bandmate Steve has been mixing the songs all week. We recorded seven and of those he thinks 3 or 4 sound really good so I am anxious to hear the final mixes and figure out how to share some of them with you.

So what’s coming up? I started writing an article on “A day in the life of my iPhone” that I hope some of you will enjoy. It is close to being done and I am anxious to share it and hear back from you. I am also packing up to head out to the Big Nerd Ranch near Atlanta next week for their Advanced iOS Boot Camp and really can’t wait. I have been looking forward to this class ever since it was announced!

Danger Will Robinson – iMessage isn’t always free!

Note to all my friends that have iPhones. You may be getting charged for iMessages that you thought were free. I just got my statement from AT&T and saw charges I didn’t expect for messages between my wife and I.  This amounted to nearly $10 in extra charges just this month.

Remember in your message app that if your message bubbles are blue, the iPhone is using iMessage and not traditional text/sms messages. This is only available on iOS 5 and later and only when txt’ing with another iPhone user who has iMessage working.  If you have an iPhone 4S you will be good!  Older iPhones should be upgraded. However, you also need to make sure it is turned on for your phone.  How will you know?  If your message bubbles are green you are not using iMessage.

The following picture shows what it looks like when you are not using iMessage and thus being charged.   Green bubbles means that you are definitely paying for text messages:

IMG_0807


This next picture shows what it should look like with iMessage.  In this case you shouldn’t be paying for text messages (but may if it falls back to SMS-read full article for details):

IMG_0804


iMessages are free because they are sent over your data plan. They can save you a ton of money. While researching these charges, I discovered that by default your iPhone will fall back to SMS if you are in an area where your data signal is restricted.  Judging by the number of charges on my bill last month, this happens more than you might think!  This can be quite misleading as you may see the familiar blue bubbles but still have a charge for it.  I don’t know if this is a glitch as I would expect that the messaging app should turn those bubbles green in this case but it didn’t for me.  In order to turn this fall-back behavior off, you will need to go into the settings app and turn it off.  Once in settings, scroll down to messages and then you will see the following screen.  Turn off the “Send as SMS” option.  Note that if you don’t care about saving money and always want your messages to be delivered regardless of how good your data signal is, go ahead and leave it on.

IMG_0806

Once I figured out what was going on, I called AT&T and experienced the best customer support I have ever had with them. They suggested that I might want to turn on “Messaging Block” to completely avoid any further charges like this. It is free to turn this on and it will block all further text messages on your phone. I immediately did this for all of the phones on our plan. She also offered to wave all fees that had been charged.  Yippee!!

So in summary:

  1. Check your bills and know what you are paying for
  2. Make sure you are using iMessage (blue bubbles)
  3. Make sure your friends are using iMessage (if they don’t have an iPhone or don’t have it turned on) you won’t be able to use it with them and you will see green bubbles.
  4. Be cautious of hidden charges if you leave the SMS fallback on
  5. Never pay for a text message when they should be free!. If you want to make sure you aren’t paying for ridiculously overpriced text messages, block them! I use iMessage for my iPhone friends and Google Voice for my friends with other phones.

For my non-iPhone friends, just use Google Voice for everything.

Warning – Understand the risks – Make the educated choice as to whether you really want to turn off the SMS fallback option.  If you want to guarantee that your messages are received (like for an emergency) you probably want to leave it on.  The reliability of messages sent over iMessage with the SMS fallback off is totally dependent on your data connection.  If you OR your messaging buddy get into a dead zone where data is unavailable, messages could get lost.  Ideally, it will queue these messages until you reach an area where data is available again.

I would recommend a conversational approach to using iMessage.  For example:

  • Me – “Hey are you there?”
  • You – “Yes”
  • Me – “Dinner is at 6”

There is an option to send receipts if the message is received too.  You can always turn this on for all of your family members and that will also help.  Happy messaging!

My Computer Museum

Well I finally did it. “Did what?” you say… Listed my first awesome and lovely Apple computer on ebay. This was my first MacBook Pro – a computer I talked about buying for probably 3 years before I actually pulled the trigger and spent the money. You see I really never cared much for the Macintosh until OS-X. I loved UNIX and in particular the SGI  and SUN Workstations I used to do my job. It wasn’t until after Steve Jobs returned to Apple and after the Classic Mac OS (OS-9) was replaced that I became interested in what these machines could do. My general rule of thumb has always been if I can’t get to the shell, it isn’t a real OS.


As I listed this machine on ebay I began to think about how many computers I IMG_0793-1024x768have bought, built, given away, traded and sold. Pleasant memories of some my favorites started coming to mind and I started listing them out. If you don’t like computers this post probably isn’t for you!

It all started around 1980 with my first computer, the Commodore Vic 20. I can remember pretty clearly that my brother and I had asked (no begged) for an Atari 2600 for Christmas. Our friends had them and the games were amazing. My dad thought that if we had a game machine we would just play games and never learn anything and he was probably right so that Christmas instead of the 2600 we found a rather ugly off-white plastic keyboard under the tree called a Commodore Vic-20. I don’t think we had any games with it though it did have a cartridge slot in the back. Later we did end up getting Cosmic Crunchers and the Temple of Asphai (on 6 cassette tapes).

If my dad had caved on the Atari, I may never have experienced the life that I commodore_vic20_1have. I may have never had an interest in computers and software and mobile devices, HTPC, automation, engineering, computer animation, art, music, and on and on… That computer, that plain looking little box hooked to the tv with a cheap RF modulator was the beginning of an obsession that continues to this day. Thanks mom and dad!


ComputerDiskCollection-1024x768So here it is, my list of computers that I have owned. This list excludes work computers (laptops, workstations, desktops, etc) and excludes mobile devices (iPads, iPhones, Windows phones, internet appliances, touch screens, and big fancy calculators – maybe they will appear in a future article)

The Commodore Years – 1980 – 1993

  • C128-1024x768
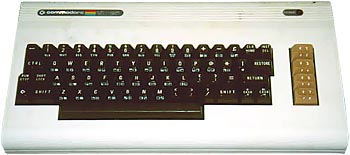
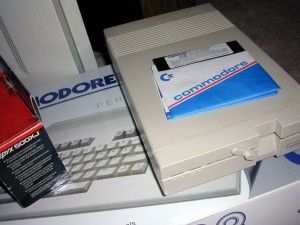
Commodore Vic 20 – my first computer with only 5k of RAM and a tape deck for storage – yes we stored programs on audio tapes!
  • Commodore 64 – very briefly as I really wanted the 128.
  • Commodore 128 with 1200 baud modem
  • *Commodore Amiga 2000 with 40MB Harddrive, 2MB RAM and 2400 baud modem – 1989 – this machine cost almost $3000 and still has a very special place in my heart – which is why I still have it.
  • Commodore Amiga 1200HD

DSCN0023-1024x768


The Clone War Years – 1993 – 2007

After the industry decided to abandon the Amiga and I would argue the FUN part of computers, I started building a steady stream of Windows and Linux based PCs. This started around 1993. I wanted to start my own BBS and feature both Amiga and PC software as well as gaming and to build a community around computing. The BBS software options seemed better on the DOS/Windows platform at the time. I didn’t like the idea of paying Compaq, Packard Bell, Dell, Gateway, or any of the other clone makers lots of money for substandard overpriced hardware when I could tailor the whole experience from case to graphics card to my own demands and budget. I also hated Intel at the time and built machines with AMD processors.

IMG_2359-768x1024


  • 1992-3 – Built first computer using AMD’s 286 equivalent and added a Practical Peripherals 14.4k modem to start a BBS
  • 1996 – Home built AMD-X5-133
  • 1998 – Home built WinXP AMD K6-2 300MHz, 6.4GB HD, Gigabyte GA-5AX
  • 2002 – AMD D1000 on an ECS K755A
  • Home built AMD-K6-2/400
  • AMD Athlon XP 2500+ Barton on Soyo KT600 Ultra Platinum, 180GB HD, 768MB RAM
  • Home Automation Server- AMD Sempron 2.6GHz on Biostar K8NHAG-07 with 512MB RAM
  • Home built WinXP HTPC AMD Athlon XP 2500+ Barton on Soyo KT600 Plus, 160GB HD, 512MB RAM

The Apple Years – 2008 – 
As mentioned at the start, when the aluminum body Mac’s running OS-X came out, it became my new pursuit to try one. These machines were not only beautiful on the outside but had a stable OS that wasn’t built like a house of cards (yes I’m talking about Windows Mr. Gates). When we finally saved enough to buy our first Mac it brought back the pure joy and fun that I had missed since the Amiga years. I still have a couple of rogue Windows 7 boxes in the mix currently but only because I had previous investments in license keys for HomeSeer and SageTV.

IMG_0803-1024x768


  • 2007 Mac Mini
  • 2008 2.4GHz Apple MacBook Pro
  • Home built HTPC (Windows 7) AMD Phenom II X2 560
  • Home built computer for son (Windows 7) AMD Phenom II X2 555
  • 2011 Mac Mini
  • 2011 27″ iMac
So there it is a brief journey thru the computer parts of my life.  Over the years I have used  two other boxes that were simply spectacular in their day but way too expensive for me to own – these are the SGI Indigo and the NeXTcube.  Let’s hear from you?  What hardware and software brings a twinkle to your eye?

C64Disks-1024x768


What is it about a riff?

Yo – Hey! It is 1:44am and I should be in bed!IMG_0781-768x1024

I have been working a lot lately and not playing guitar all that much. I love the work I do so I am definitely not complaining. Around midnight I turned around and picked up a guitar. Believe me when I admit that this is a dangerous thing for me to do! There have been times in the past when I would pick up a guitar and not put it down for 3 or 4 hours. Tonight I had a sound in my head that I wanted to get out. A little riff that I wanted to experiment with. Not sure where it came from. Not sure it is even completely mine – though I hope it is.

What is it about a guitar riff that is so powerful, so memorable, so engaging? How can it stick inside your head? How can hearing it on a radio turn a troublesome day upside down? Music is an amazing, awesome thing! Take a moment to think about some of your favorite riffs. Even if you are not a musician, there must be some recognizable musical pattern that moves you or brings out a smile. Is it the intro to Sweet Home Alabama or Sweet Child of Mine or one of the tens if not hundreds of masterful riffs by Eddie Van Halen? Just a few notes will take you some where – Cabo Wabo just came into my mind.

At any rate this is a rather random stream of consciousness type of post. I sometimes ramble before I sleep and sleep is soon my destination.

I let this riff in my head out and captured it with my iPhone and threw it up on YouTube. There are timing glitches and some general sloppiness but in the midst of the mess there is something that I rather like. Something that might be nice to improve upon. Maybe I’ll try throwing it into garage band and see if I can turn it into something bigger.

Thanks for listening and as always drop me a comment and check out my YouTube channel. At some point I’d like to find the time to do a recording or video that I can be really proud of – something that I invest some real time into and something that is really worthy of your time to check out.

Rocket Tubes – The Transportation System of the Future

IMG_0748-768x1024Yo – hey!  It is the second day of the year and I head back to the office tomorrow.  I have been working on cleaning my home office and basement over the holidays.  In the far corner of my basement there has been a rather large box that I have kept sealed for years.   The box has moved three times and has sat in this particular corner for at least the last ten years.  My mom had packed it up right after I moved out.   I knew one of the things in that box was my old Rocket Tubes track.  I had fond memories of that toy and wanted to keep it well preserved until I had kids old enough to enjoy it and not immediately destroy it.  Today was that day!

In the box I found some other real treasures of long ago.  In addition to the Rocket Tubes, I found my old Star Wars X-Wing and action figures!  I also found my old Radio Shack morse code practice oscillator, an astronomy kit, a little wood workshop, an electronics kit, and Star Bird toy.


IMG_0730-1024x768My kids weren’t really interested in most of the stuff but did find the Rocket Tubes of ´particular interest.  We took it out of the box and set it up.  This really was an amazing toy and I am surprised after all of these years it still works.


I have never seen a toy like this since.  After a little investigation I discovered thatIMG_0742-768x1024 the Rocket Tubes came out in 1979 from Mego Micronauts.  They were billed as “Rocket Tubes – The Transportation System of the Future.”  The set was similar to race tracks of the time only in this case it was little cars and robots that float thru air powered tubes.  With the track you could create space elevators or typical racetrack type loops.  Very cool indeed!  My oldest son was the most interested.  It was pretty good entertainment for a couple of hours and a nice trip down memory lane.


Here it is in action!

Oh and I had to play with the StarBird too.  Here it is.

Now play time is over and time to get back to work!


HD500 based pedal board

I hope everyone had a great Christmas and New Year. I have been wanting to talk about the way I have set up my HD500 for a while but been too busy with other projects.  This morning I had a major issue.  It appeared that I had lost all of my patches which forced me to scramble up a quick basic brand new patch about 10 minutes before showtime.  I messed around with the board tonight to happily discover that the entire problem was in my head. I was not hitting the right button to reload the other sound banks. All this was a result of a total lack of sleep.  Last night was New Years Eve after all.  🙂  Since I had things out on the floor, I took some pictures and put this post together real quick.


Pictured above is the rig I ended up putting together between January and July of last year.  I am sure most of you will agree, this type of project never ends.  I am sure I’ll be filling up that remaining space at some point but am happy with the flexibility and portability I have now.  I haven’t done anything with it since the end of summer other than tweak patches to include the fx loop.IMG_0717-1024x522

Requirements

I wanted something that would work well in a variety of situations and give me a large palette of great tones to work with. I play at church and plug in straight to a PA so I wanted something fairly light and quick to set up for that purpose. When I am playing with a band, I like to have an amp too. This setup ideally should work well either with my 5150 half stack or into a Tech 21 Power Engine 60. Sadly I have not experimented enough with the 5150 to say whether I like it in that scenario but it sounds great into the PE60.  Note that I have heard very good reports of using the 4-cable method to maximize the sound of both your amp and the HD500.  

The Tour

For the tour of the board I decided it would be easier to show it in a short video rather than try to describe it so I recorded something and put it up on YouTube. I have been experimenting with some music and comedy videos out there just for fun and wanted to do something a bit more serious that might have a chance of helping someone who is thinking about effects, boards, gear, and setting things up.

Here is the link, I hope it is of some value!


Google Analytics – for web and mobile traffic

For some odd reason, I have always enjoyed tracking certain types of data. I was very happy when I hooked up the Jetpack suite of plugins for WordPress this past weekend and was then able to see basic site traffic information. Tonight (guess I should say this morning) I have also incorporated a second level of tracking – Google Analytics.

Setting up Google Analytics to track your own app or web page is pretty simple. It will tie your analytics access to your Google account – a simple gmail account will be just fine.

Go to http://www.google.com/analytics/ and click the link saying “New to Analytics -sign up now.” If you already have a google account just type in your credentials on the next page.  You will need to put a note in your app that clearly states that users are being tracked.

Like many google pages, there is a gear on the top right.
Click the gear to go to the account administration screen
Click the plus sign to add a new account
Now you will enter the name and URL of the site or app you want to track.
After you have filled out this short form, Google will generate a unique identifier for you to use from your mobile app or web page. This ID in their terms is called a UA code.

Once this is set up you are ready to use their UA code from your app or from your web page.

Since this post is meant to be only a high level introduction, I will keep this short. Excellent documentation is available on the Google Analytics site.

Tracking basic web pages
If you want to track a web page, just cut and paste the javascript they give you when they generate the code.

Tracking WordPress pages
If you want to track your WordPress page, I recommend installing a plugin such as the Google Analytics for WordPress plugin. It will allow you to type this UA Code in and then do page level tracking.

Tracking iOS page views
Grab the latest Analytics SDK directly from Google – http://code.google.com/apis/analytics/docs/mobile/download.html#Google_Analytics_SDK_for_iOS
Extract it and copy the GANTracker.h and libGoogleAnayltics.a into your existing iOS project with Xcode.

Open up your application delegate and in didFinishLaunching add the following snippet

[[GANTracker sharedTracker] startTrackerWithAccountID:yourTrackerId                          dispatchPeriod:10
                      delegate:nil];
 Now you can do page tracking with a simple line like this: (note I would put this in viewWillAppear in a view controller)
NSError *error;
if (![[GANTracker sharedTracker] trackPageview:yourPageName withError:&error]) {
        NSLog(@"Analytics logging failed %@", error);
}

Conclusion

There is a lot more you can do besides page tracking, but this is enough to hopefully perk your interest and set something up. As you can see, it is really minimal effort to get something up and running.   They have an API for Android and other platforms as well.  As I said before, Google’s documentation is great and for free analytics, it is really excellent!    The benefit of data like this is to aid you in creating better experiences for your users to see what features they like and what gets ignored.  Your biggest challenge will be in determining what and how much to track to gain the best insight into their needs.


Create Smart Playlists to find those lost Christmas favorites

There are only a few more days until Christmas.  Time to enjoy those delicious once a year peppermint milkshakes from Chick-Fil-A and peppermint blizzards from Dairy Queen.  It is also time to enjoy your favorite holiday tunes.  If you love Christmas songs but have trouble finding them in your ever-growing iTunes library, consider this quick tip.

Set up some Smart Playlists!  

Most people are familiar with Playlists which allow you to add a bunch of songs of their choosing to a named list. Playlists are a great way to help manage a music library that doesn’t change much.


Smart Playlists takes things to the next level. This is a feature that was actually added to iTunes several years ago.  Sadly I didn’t catch on and try it until this past Halloween when I was trying to find some spooky songs for trick-or-treaters.  For managing things like holiday song mixes or favorites within a constantly growing IMG_0444-1024x768library it is AWESOME and best of all completely fluid. As you add new songs to your library, those new songs will appear in your smart playlists dynamically if they match the rules that you define.
To set up a new holiday playlist in iTunes, hold down the Option key (see my other post about the magic of the option key).  This will turn the + sign at the bottom left to a gear.gear
Smart Playlists have this gear image next to them to indicate they are different from the regular playlists. You will now have a form to fill out to define the rules of your new lists.
Here are the rules that I use for my Christmas music selections.


Screen-Shot-2011-12-14-at-8.09.16-PM

Note that you can add more rules to get more specific.  If you are good about rating your songs with stars you could add a rule to only play your best (3 stars or greater).  You can also nest rules.  Once the rules are set, when you select this new smart playlist in iTunes it will immediately show you EVERY song in your library matching your set of rules.  If you make the rules too broad, you will get more than you want.  If they are too narrow, you will have too little.  Play around with your own set and see what you get.  If you come up with something you’d like to share, post it in the comments!  Have fun and Merry Christmas!